Removing Sachs Sprockets
By Alan Buehner
Sachs counter shaft sprocket are a taper fit to the end of the main shaft. There is no woodruff key used and the sprocket is held firmly in place by the taper fit.
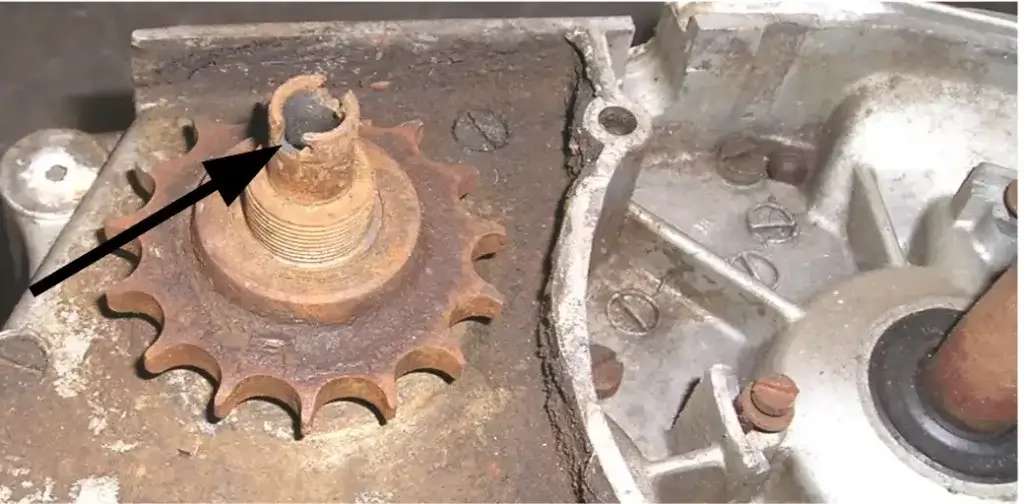
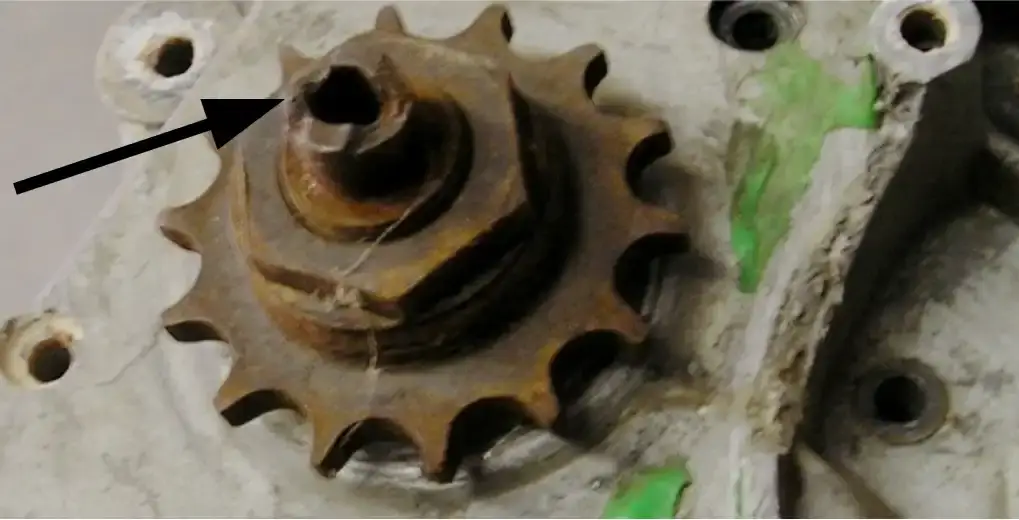
The end of the main shafts are slotted to fit into the tabs of the brass spiral VDO drive gear inside the ignition case (see photo A). Failure to install a protective cap on the end of the main shaft when using a puller to remove the sprocket will result in the slot splitting and breaking off. (see photo B).
Original factory pullers (Sachs part no. 0276-011-105) and the protective cap (Sachs part no. 0676-012-200) are difficult to find but are not required to remove the sprocket. You can use any heavy duty gear puller as long as it will fit under the teeth of the sprocket.
You can use a 13mm socket as a protective cap. Just place it over the end of the main shaft (as shown in photo C).
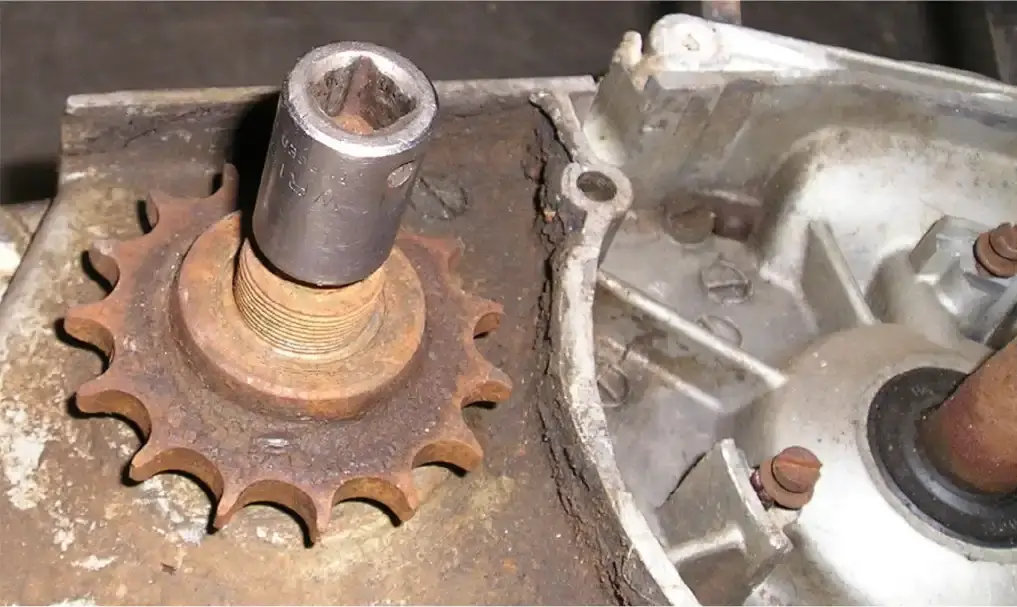
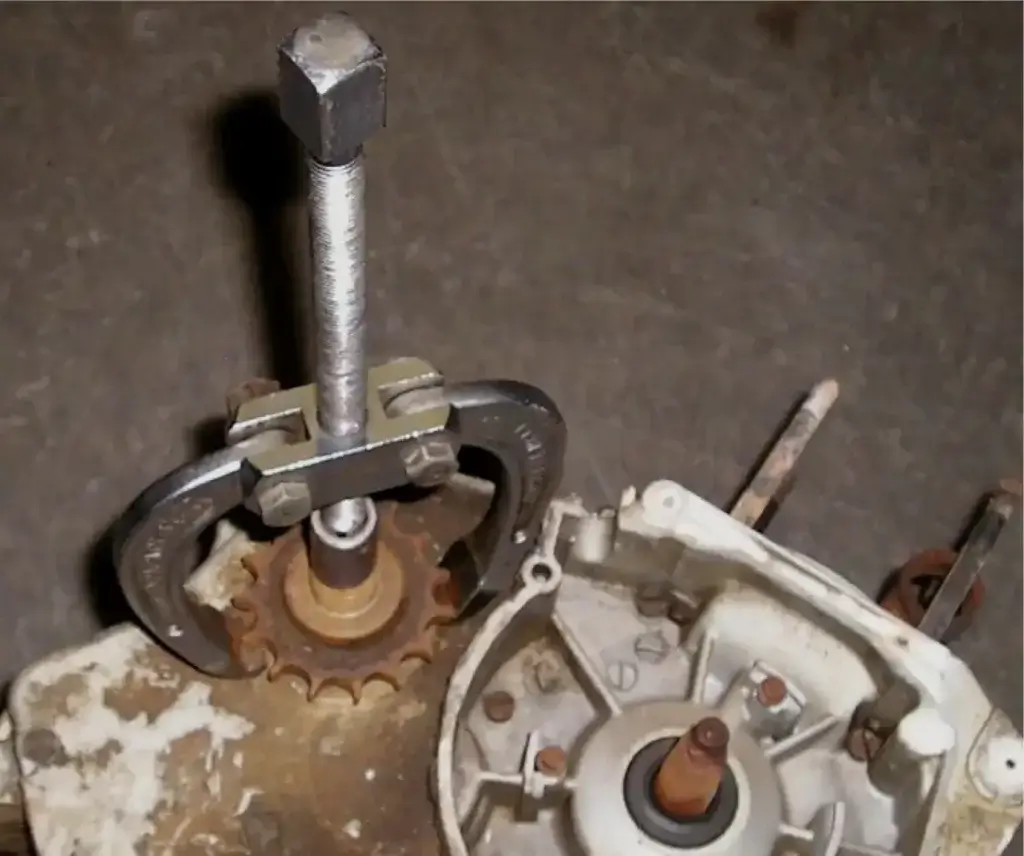
If the end of the puller is a smaller diameter than the O.D. of the 13mm socket, then it would be best to place a thick washer between the socket and the puller to prevent the puller from getting impaled into the socket. Photo D shows a puller in position over a 13mm socket.
Because the taper fit is so tight, do not expect the sprocket to come off easily. You will be tightening down on the puller to the point where you will swear the puller is going to break which is why you need to use a drop forged puller. A cheap steel puller will only bend.
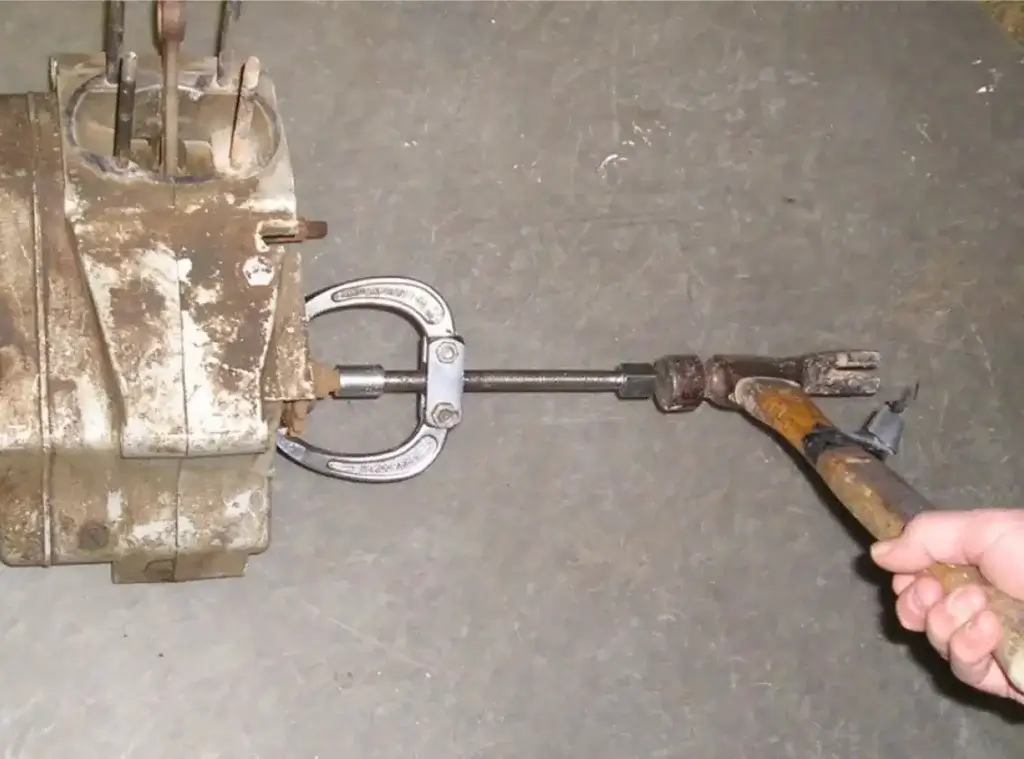
When you get to the point that the puller becomes difficult to turn, stand to the side of the puller and give the crank end of the puller a good strong wack with a hammer (see photo E). The sprocket will literally fly off the end of the main shaft. Heating only the sprocket will help the sprocket to expand and should make it easier to remove.