

Home-Made Special Engine Tools
by Alan Buehner
Originally printed in the 2010 issue #49 of Still….Keeping Track
Working on Sachs and KTM engines can be intimidating even for a seasoned mechanic who has never worked on these engines before. When you go through the repair manuals, there is a page showing a drawing of all the special repair tools that you are led to believe that you are required to have in order to pull the engines apart and re-assemble them. These tools help to help make the job easier and enable you to do the job properly. Most of these tools are unobtainium (Latin for not available) but some of these unobtainium tools can be easily made and are already in your tool box. This article is to show you how.
Ignition Advance Timing Gauge
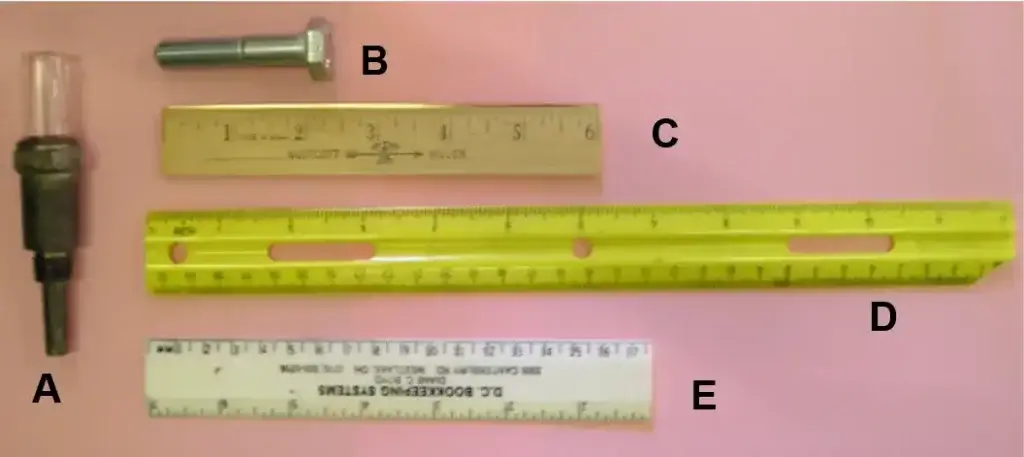
This is a photo of a factory ignition timing gauge (item A) and a sample of what you need to make your own. Item “B” is a 10MM hex head bolt that is at least 2 inches long. Items “C,D, & E” are samples of inexpensive metric rulers that can be bought or may be laying around in a desk drawer at home or in your office.
The factory ignition timing gauge (item A) is a spring loaded plunger device with a clear glass window on the top. You screw it into the spark plug hole and as you bring the piston to top dead center, the piston pushes the plunger up and the top part of the plunger rod shows up in the window with grooved lines on it, spaced 1mm apart. When the piston reaches top dead center, you back it down and start counting the grooved rings for the timing. When you arrive at the timing you need, you run your pin through the Motoplat flywheel to see if it is correct.
The bolt (item B) needs to be 10 or 12mm in diameter so that it will fit into the spark plug hole on the cylinder head and yet is big enough so that it will not fall down inside. It must be long enough to rest on top of the piston at top dead center and be long enough to ride the top of piston down without hanging up on the cylinder.
The sample rulers shown are all too long to be used when timing an engine that is in the frame and must be cut short enough to fit the tight space between the cylinder head and frame.
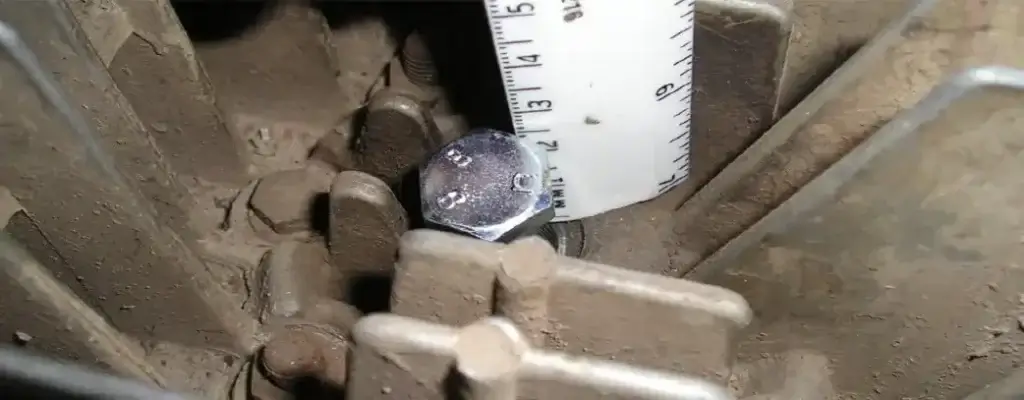
This photo shows how to use the bolt and ruler on a KTM cylinder. Hold the ruler next to the bolt (at T.D.C.) then slowly turn the flywheel counter-clockwise as you watch and count the bolt drop down along the ruler to the required number of millimeters for the timing.
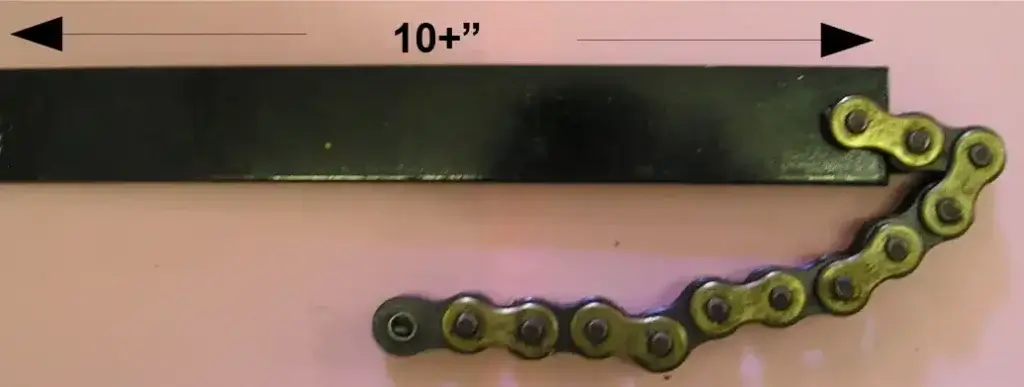
Spanner for Sprocket & Flywheel
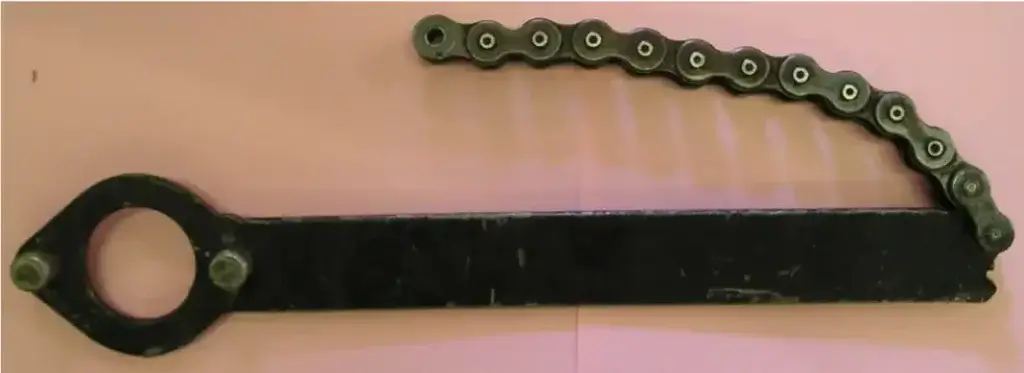
Photo of a factory made spanner. This tool was designed to work on the Sachs and KTM engines. The chain wraps around the sprocket and the extra chain is held in your hand against the metal bar. The end of the bar gets jammed against the teeth of the sprocket to hold it immobile while you remove or tighten the sprocket nut.
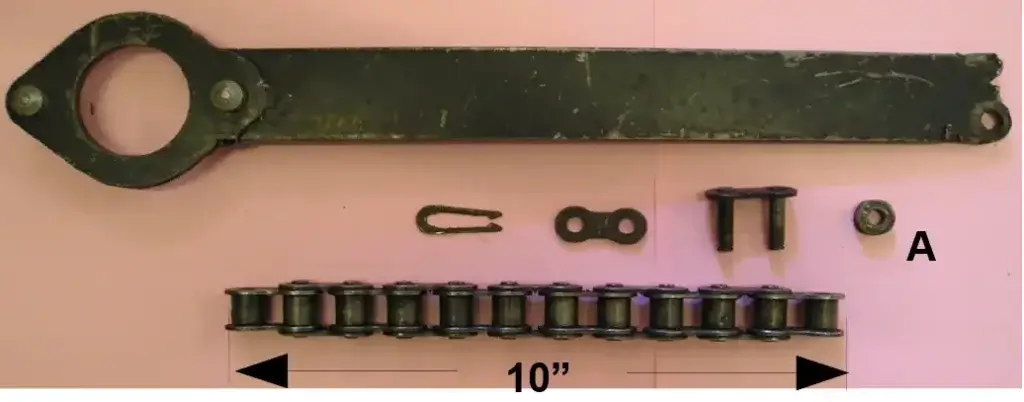
This is a photo of the factory spanner with the chain removed. As you can see, this tool is very simple to make. All you need is a bar of steel 1-1/4” wide x 1/8” thick x 10” long. The chain is 10” long and can be made from any scrap from that you have laying around (new or used). NOTE: a spacer bushing (item A) is used on the steel bar when inserting the master link to help support the chain and prevent the bar from wiggling around when using it.
This photo shows a sample of a home made spanner. The mounting hole is shown in the center but can be also be near the corner of the bar (as shown on the factory spanner). You can make a separate spanner with a 428, 520, and 530 chain or just remove and replace the chains when you need to. The master links make changing the chains fast and easy.
KTM Screwdriver for Clutch Screws
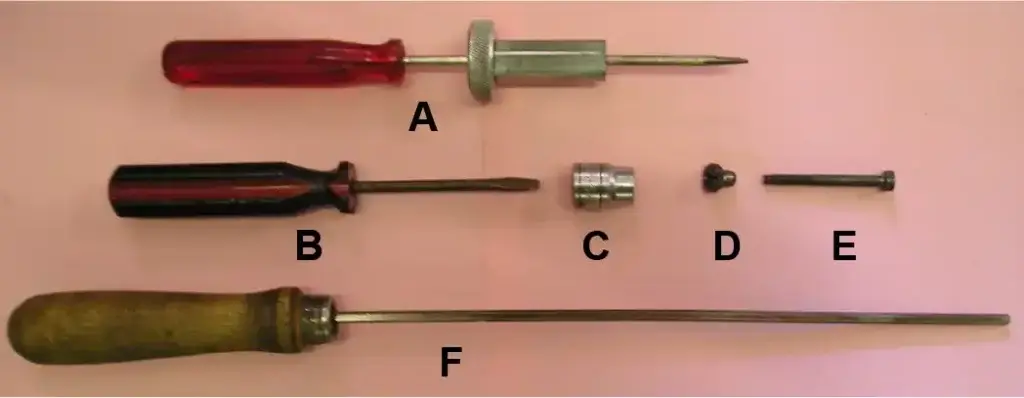
Item “A” shows a factory screwdriver for removing and installing KTM clutch nuts (D) from screws (E). Item “B” is an ordinary flat blade screwdriver that will fit into the slot of screw (E). Item “C” is a 10mm socket found in your tool box that will fit over the nut (D) and is used to remove or install the nut while the screwdriver (B) is inserted through the 10mm socket and is used to keep the screw from turning.
The special KTM hex screw driver (F) is only used if the slot end of the screw is broken. It is rarely needed or used.