

Overlooked Maintenance Items
by Alan Buehner
Originally printed in the 2006 issue #30 of Still….Keeping Track
Magnesium backing plates
Remove, clean, & grease the pivot pin (a) on a regular basis. Lack of lubrication will cause the magnesium to wear by the pivot pin and wear out the mounting hole (b), resulting in a loose pivot pin and loss of braking pressure.
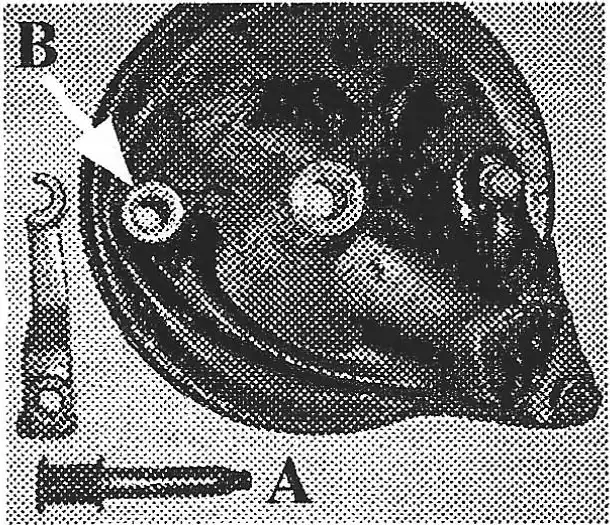
A simple fix to keep the pivot pin greased without having to disassemble the rear wheel is to install a zirk grease fitting in the backing plate at "C". Caution: when using a grease gun, do not pump a lot of grease into the fitting. The excess grease could build up on the inside on the brake shoes and lining.
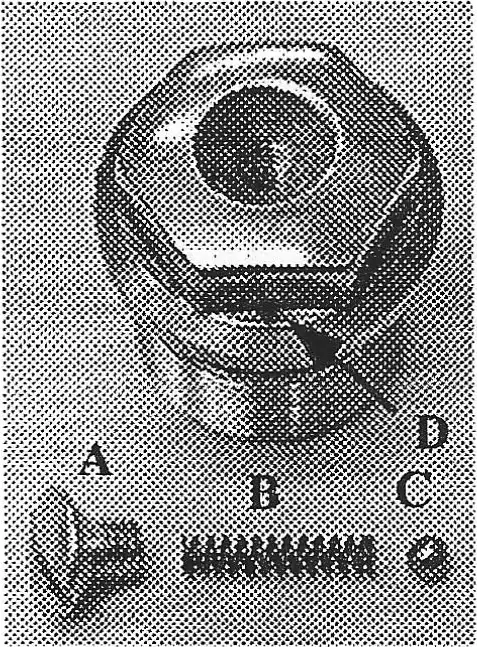
Vents on fork tube nuts.
When changing your fork oil, and or after a wet or dusty ride, check the vents on the fork tube nuts. Remove the screw (A) in the center, remove the nut from the fork tube, and check that the spring (B) and ball (C) are clean and dry. Replact;.them if they are rusty or pitted. Use a fine wire to make sure that the vent hole (D) is not obstructed.
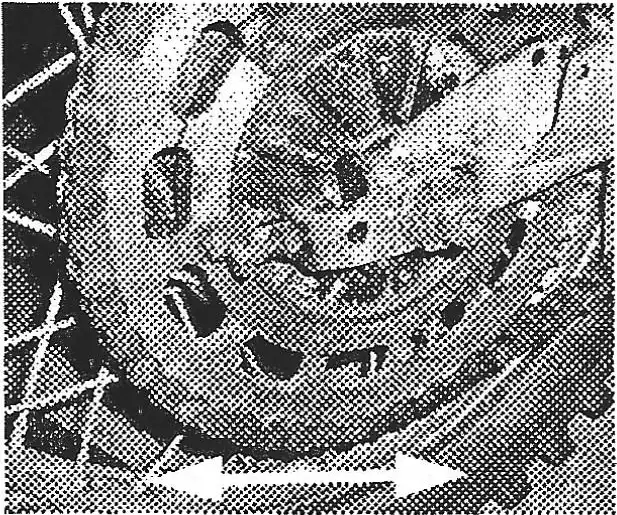
Cush drive bearings & rubbers on CMF's
The cush drive rubbers should be checked for wear on a regular basis on bikes that are being raced, especially on the 1972-73 Jackpiners. The torque on the l75's is powerful enough to rip the lugs off of the hubs if there is too much side-to-side play between the sprocket carrier and the hub from worn rubbers. The easiest way to check for excessive wear is to grab the rear sprocket, with the rear tire resting on the ground, and try to move the sprocket back and forth. With good rubbers, there should be little or no movement of the rear sprocket. With worn rubbers, there will be very noticeable movement of the rear sprocket.
If you are racing these bikes, check the bearings on the sprocket carrier on a regular basis. These bearings will wear out faster than the hub bearings especially under wet and dusty conditions.
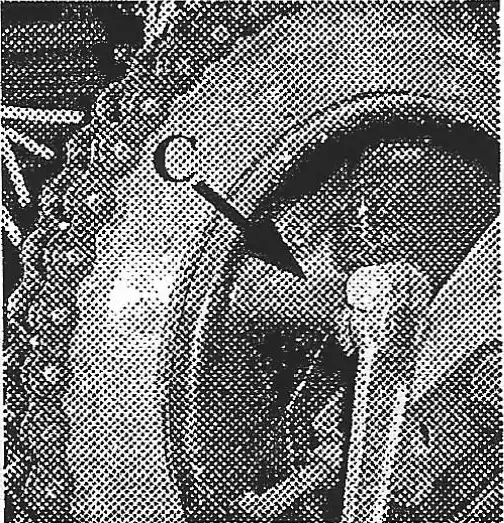
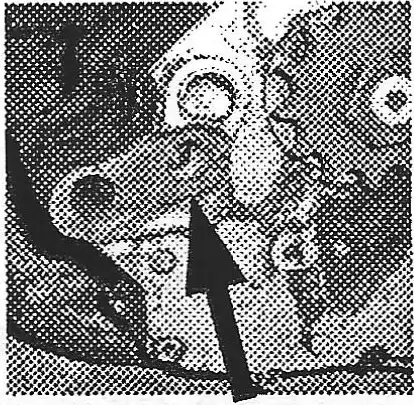
KTM engine mounts - especially 400 /420 /495
All mounting bolts on the KTM engines should be checked on a regular basis to make sure that they are tight. All mounting bolts on the 400 / 425/ 495 engines should be checked after each day of riding. Engine vibration will cause the nuts to loosen. If they get loose, the engines start to wiggle around in the frame and then the magnesium cases start wearing away. Left unchecked the engine will wind up looking like this. The steel frame mounting tabs will wear into the case, the bolts will wobble out the holes and the cases will eventually break. If you are still using the original 30 year old nylock nuts, replace them with new ones.

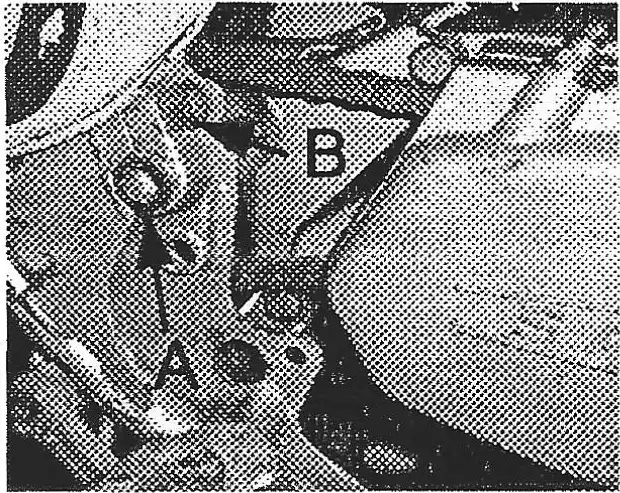
Swing arm mounting bolts.
A commonly overlooked maintenance item is the swing arm bolt (A). It should be removed, cleaned, greased, and re-installed on a regular basis on all bikes that are being ridden. The reason for this is to prevent the bolt from freezing up inside the swing arm and becoming impossible to remove without cutting it out. On bikes with the conical rear hubs, the two screws on the swing arm should be removed and make sure there is plenty of oil around the inner axle (see maintenance instructions in your Penton/ KTM Owners Manual).
If the swing arm bolt is frozen inside and will not come out, check the swing arm to see if there is any play at the swing arm. If not, you can leave it as is and use the bike for easy riding. In many circumstances, the bolt will turn, unthreading itself on the left side of the frame as it pushes the frame away from the swing arm. Do not beat on the frame to try and loosen the bolt. The only way to get it out is to remove the engine, spread the frame at the swing arm enough to cut the bolt, the left side first, then the right side.
Note: New old stock and used swing arm bolts are difficult to find.
After re-installing the swing arm bolt make sure that the Allen head pinch bolt (B) is tight. This bolt should be checked on a regular basis to prevent it from loosening.
A Doug Wilford tip for Sachs Motors
When pulling the counter shaft sprocket, loosen the nut but do not remove it. Back it away from the sprocket by about 1/8", install the puller, and then remove the sprocket. The nut will prevent the sprocket from flying across the garage when it "lets go".
Also remember to use a "protective cap" on the end of the mainshaft when installing the puller to prevent the split ends of the mainshaft from flaring out and breaking.